7 Key Reasons Why Your Succulent Never Roots and How to Fix It
Hello! I am your little succulent housekeeper. Recently, I have received so many messages asking, “How come the newly purchased succulent doesn’t root even after half a month of planting? The leaves are all wrinkled!” Today we will talk about this problem that drives newbies crazy – succulent potting difficulties. Remember these two core words: succulent rooting and pot serving tips, follow me to do these steps right, your little cutie will be back on its feet in no time!
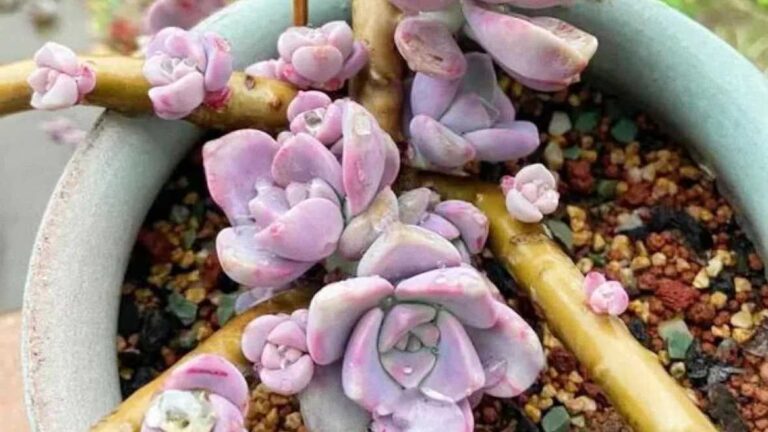
3 seconds to determine whether the succulent successfully rooted
First to the “itchy party” focus! Freshly planted succulents should not be pulled out every day to check (don’t ask me how to know). Use these two methods to observe:
Look at the heart of the leaf magic: successful potting of succulents, the center will be through the tender green, like a bride wearing a tulle. If you’re lucky, you’ll also find new baby leaves the size of grains of rice.
Leaf Stretching Exercise: The originally tightly embraced leaves will slowly stretch out as if waking up from sleep and stretching. That’s what happened to my Peach Egg last month, from a rosebud to a parasol!
A guide to solving the 7 biggest rooting problems
- watering assassins (the easiest pitfall for newbies!)
Problem: What you think is love is actually harm! Rootless succulents can’t drink too much water, and stagnant water will deprive the soil of oxygen and rot the roots before they grow.
First aid program: pot with damp soil (feel like a wrung out towel), the first 7 days firmly do not water! After that, water 2 times a week along the edge of the pot, and then water normally when you see new roots.
- Soil mixing maze
Common mistakes:
Full granular soil: it’s breathable, but it’s like living in an empty house where you can’t find nutrients.
Slabbed garden soil: it’s like running in rainboots, suffocating!
Golden formula: basic soil + 30% terracotta + 15% vermiculite + 5% maitake. My secret weapon is to add perlite, new roots are guaranteed to grow!
- Temperature Trap
Survival rule:
Summer > 32 ℃: succulent into the “nap mode”, this time do not toss it!
Winter <10℃: grow like a sloth, wait patiently for spring!
Smart practice: buy back the bare root succulent can play “trapeze” – set up in the bottle mouth, keep the environment moist but do not touch the water, like a root SPA.
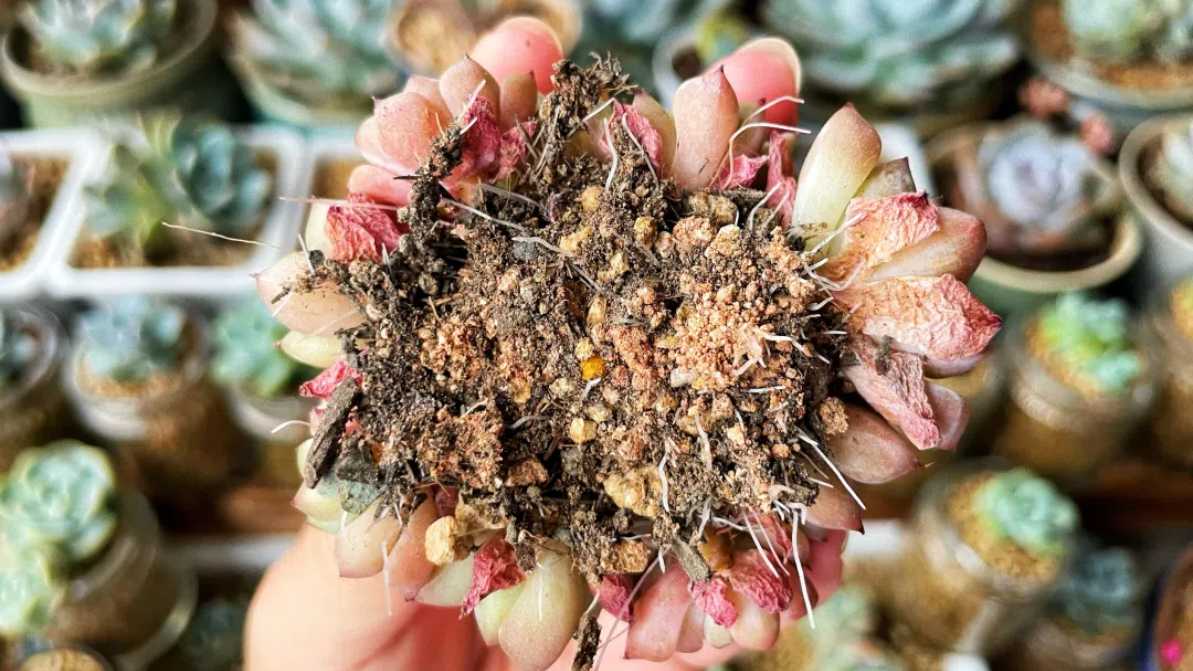
- Root pruning must be taught
Tears of blood lesson: the last time I did not repair the roots directly planted, three months did not move! When I peeled out, the dead roots looked like spider webs wrapped around the new roots.
Correct operation: after receiving the bare root succulent, decisively cut off all the dry fibrous roots (do not feel pain!), dry for 24 hours before planting. If you have a bare root succulent, cut off all the dry roots (don’t feel bad!) and let it dry for 24 hours before planting. It’s like caring for your hair, cut off the split ends to make it healthy.
Special Notes
Breed Differences:
Fast shooter: Peach Egg/Bear Child (7-10 days)
Chronic: Old Pile / Twelve Rolls (may take 1 month)
Ventilation is the lifeline: ensure 3 hours of air flow every day, my tip is to use a small USB fan to blow regularly.
Woody old stumps: they are like old grandpas, slow to root but stronger. The 8 year old jade tree last year waited 45 days to sprout roots and now grows taller than me!
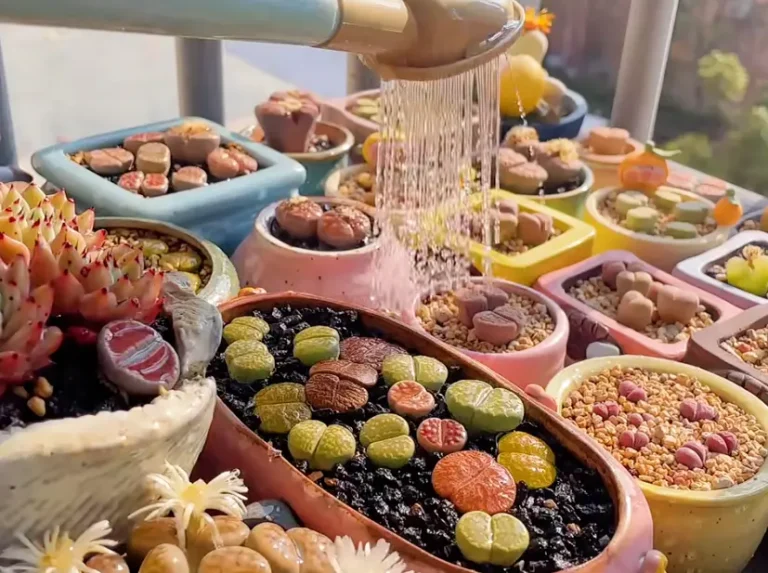
Remember, succulents are the art of time. Just do these 7 steps, avoid black rotting water, and leave the rest to sunlight and patience!
The Ultimate Guide to Rooting Succulents in Air: 4 Scenarios + 3 Steps to Save Vulnerable Meat
Today in I’m sharing a succulent rooting method with you – succulent air rooting tips.When I first got into the game 5 years ago, I watched my online purchased Ice Jade melting in the water and couldn’t do anything about it, until I discovered this amazing way to root. Remember this core term: succulent air rooting, it will help you save 90% of your critically ill succulents!
4 emergencies that must be rooted in air
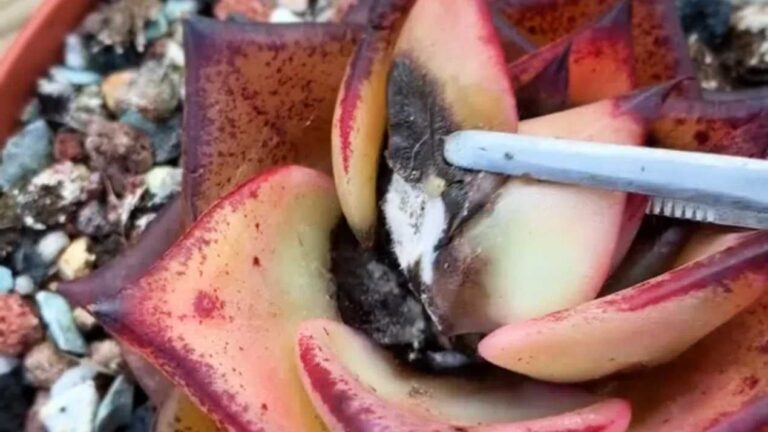
- “ICU Rescue” after beheading a black rot
Just saved a black rot Raul last week:
✓ Brown lesions on the stem after beheading
✓ Cutting must be left to air dry for 3 days to form a protective film
✓ Put on a mesh tray and elevate it (I use an egg tray which is super handy)
✘ Never stick in the soil directly! The last time I did this, it led to a secondary infection and rotted in 3 days. - “Safe Mode” for Fattening Succulents
Ice Jade / Orange Monroe / Ebony Care Tips:
⚠️ Online Shopping Shipping = High Temperature Sauna + Violent Express Delivery
✅ Remove Soil and Dry Roots Immediately After Unpacking
✅ Rooting in Air Instead of Conventional Planting
My Measurement Data: 81% Survival Rate for Roots in Air vs. 53% for Roots in a Pots - “Staggered Operation” During the Hot Season
Remember this! Temperature formula:
28℃+dormant period=difficulty in rooting
Solution:
⏰ Time to buy meat vs time to root = 15 days staggering
🌡️ Temperature drops to 25℃ when rooting is completed
💡 Tip: Maintaining 26℃ in the air-conditioned room can speed up rooting - “Resurrection Ceremony” for Old Wooden Stumps
Old Stumps Rooting3 Elements:
45° slant cut to increase rooting surface (2 times faster than flat cut)
Dry in the shade for 7 days or more
Spray with HB-101 Vitalizer (twice a week)
3 steps to master the correct posture of rooting in the air
Step1: Build a “sterile ward”
Humidity control: 50-80% (put a glass of water next to it)
Principle of light avoidance: North window sill>East window sill>LED supplemental light
Recommended tool: grid seedling tray + moss mat (keep the bottom slightly damp)
Step2: Nutritional management of mother leaves
⚠️ Consumption rate warning:
Thin-leaved system: consume 1 piece of leaf per day
Thick-leaved system: consume 1 piece of leaf per 3 days ✅ Best observation period: check the leaf layer change every morning ✅ Best observation period: check leaf layer changes every morning
Step3: The golden standard of transplanting timing
👉 Root length >2cm and capillary roots appear
👉 No leaf consumption for 3 consecutive days
My lesson of overturning: prematurely transplanted Fairy Cups withered roots in 3 days!
Ultimate care after rooting in the air
Soil preparation (for 80% of the varieties):
70% granular soil (myrmecite + terracotta + volcanic rock)
30% peat soil (mixed with a small white medicine to protect against pests)
Watering rhythm:
🌱 10 ml of water along the sides of the pot on the 3rd day after transplanting
🌿 Water thoroughly on the 7th day (stop when you see water coming out of the bottom of the pot)
Light transition:
Week 1: 1 hour of morning light per day Week 2: increase to 3 hours Week 3: full sunlight (at 35°C) possible 1 hour of morning light per day
Week 2: Increase to 3 hours
Week 3: Full sunlight possible (below 35°C)
Please stop rooting in air in these situations!
As amazing as air rooting is, please discontinue it immediately in the following scenarios:
Mealybug eggs are present (can be airborne)
Extremely dry conditions (humidity <40%)
Cuts are not fully healed (less than 3 days of drying)
Remember, air rooting is a first aid measure not a routine!