[Newbie must see] 3 safe and effective succulent popping sprout tips, easy to raise popping pots of hand bouquets!
Hello everyone! I’m your succulent nurturing partner, and today I’m going to share practical tips to make single-head succulents turn into clusters of exploding pots. Whether you’re a newbie, or a meat lover who wants to advance in sprouting care, mastering these 3 ways to promote succulents to burst side buds will soon turn your balcony into an enviable succulent paradise!
First of all, my care experience: I recommend natural sprouting method than manual intervention, but for different varieties and growth, the appropriate combination of pinching and beheading method will be more effective. The next step is to explain in detail the application of each method of the scene and points of operation, remember to see the end of the exclusive maintenance tips oh!
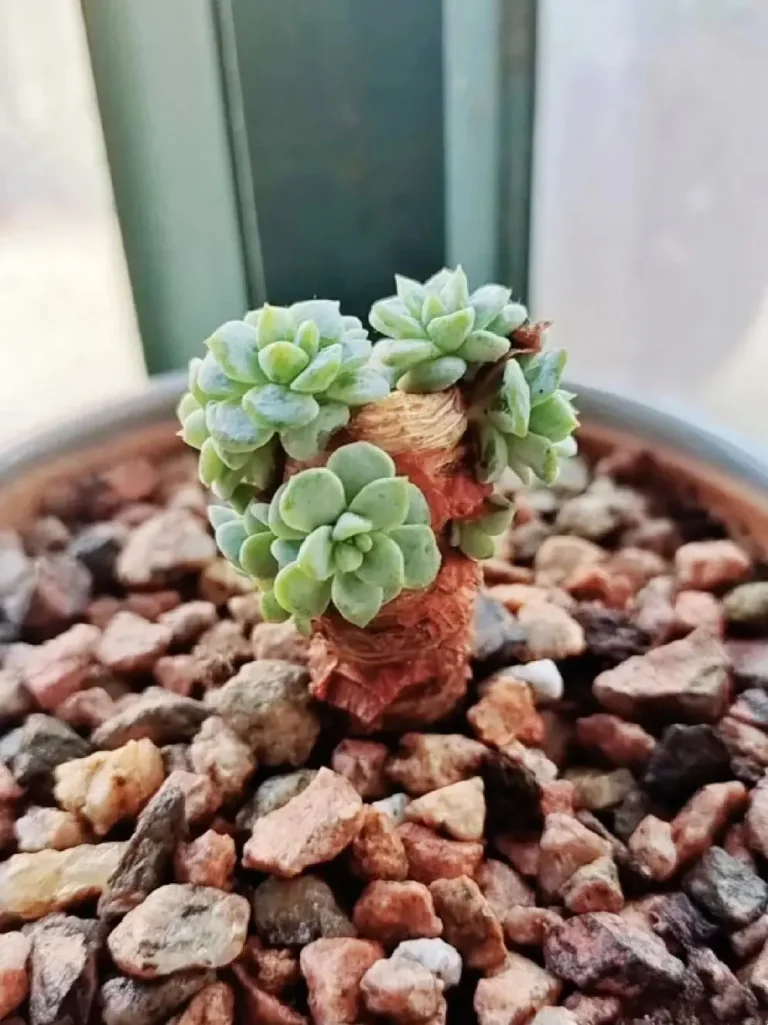
Method 1: Precision beheading to promote germination (suitable for stunted/diseased plants)
Best time to operate:
Spring and fall growing season (temperature 15-25℃)
When the plant shows obvious ungrowth or black rot at the bottom
Specific operation steps:
Prepare sterilized sharp blades.
② Keep 3-5 healthy leaves at the bottom.
③ Make a quick diagonal cut of the stem at an angle of 30 degrees.
④ Apply carbendazim powder to the wound.
Apply carbendazim powder to the wound ⑤ Place the mother plant in a ventilated and light place.
Precautions:
⚠️ Avoid water on cuttings for at least 7 days
⚠️ Cuttings can be propagated.
⚠️ The mother plant starts to explode side shoots after about 20 days.
Method 2: Gentle centering and bud bursting (suitable for rosette varieties)
Applicable varieties recommended:
Chihuahua
Silent Night
Jade Butterfly
Flower Moon Night
Step-by-step illustrated instruction:
Step 1 ▶ Hold the center 3 layers of leaves with tweezers.
Step 2 ▶ Turn clockwise and pull out gently.
Step 3 ▶ Check if the growing point is completely exposed.
Step 4 ▶ Spray with diluted HB101 Vitalizer.
Maintenance Focus:
☑️ Keep the temperature difference between morning and evening above 8℃.
☑️ Avoid direct light for 10 days after centering.
☑️ Apply slow-release fertilizer containing phosphorus and potassium.
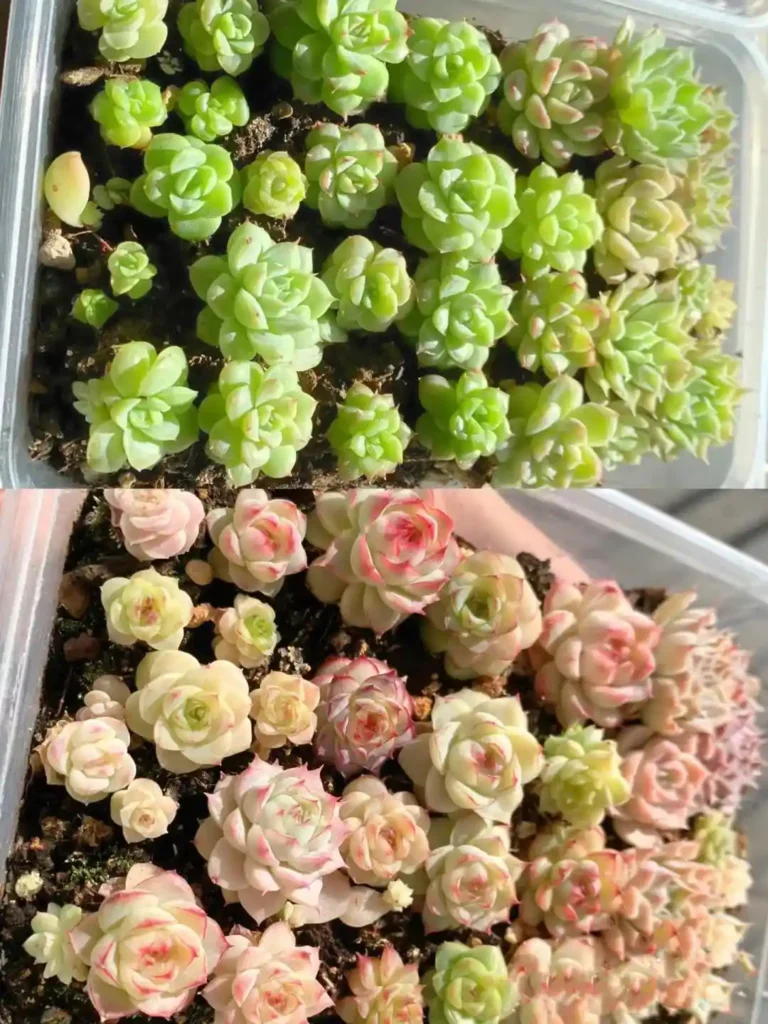
Method 3: natural sprouting secret (most recommended!)
This is my personal favorite Buddhist method of bursting pots, as long as you do these 4 points, 80% of the succulent varieties can burst buds on their own:
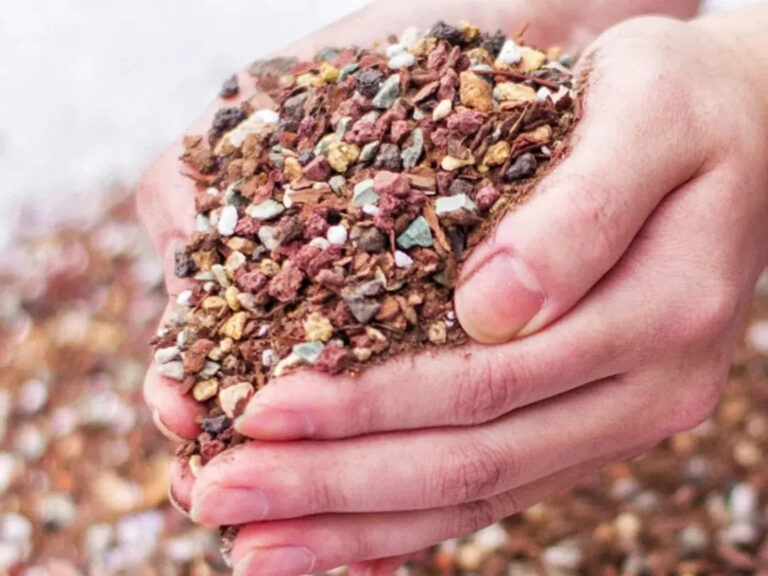
The golden ratio of soil allocation:
Seedling stage ▶ 70% peat soil + 30% pellets
Plant stage ▶ 50% peat soil + 50% pellets
Older plants ▶ 30% peat soil + 70% pellets
Key tips for controlled feeding:
● Use breathable red clay pots (2cm larger than the crown diameter).
Apply Melaleuca Liquid Fertilizer once a month in spring and autumn.
Watering by “soaking pots” (10 days between each watering).
Maintain direct light for more than 4 hours a day.
Germination aids:
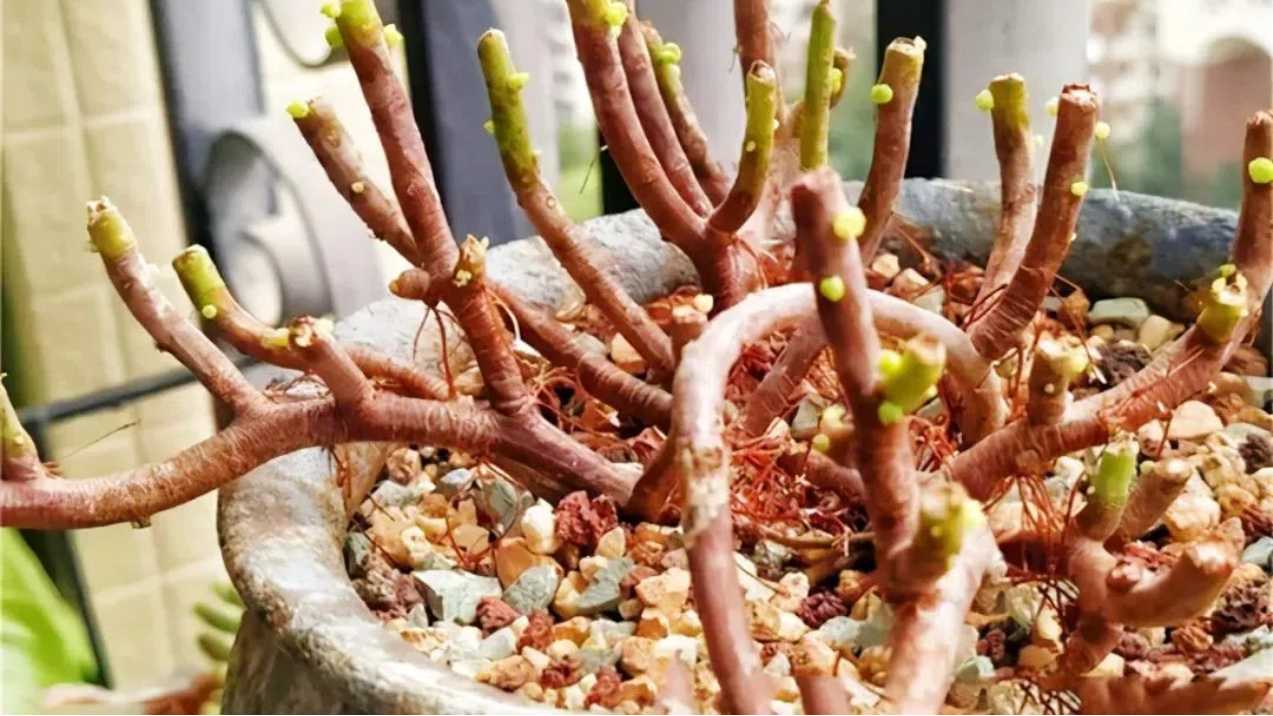
Periodically remove the aged leaves at the bottom to expose the growing points of the stem. Remember to leave the base of the leaves intact, so that you will be surprised to find new pink buds appearing in about 2 weeks!
FAQ:
Q: Do I need to change the pot immediately after bursting the buds?
A: It is recommended to wait until the side buds grow to 1/3 of the size of the mother plant before changing the pot, the new buds are too small and easily damaged during the pot changing process.
Q: Can I operate these methods in winter?
A: Stop all artificial intervention when the temperature is lower than 10℃, low temperature environment will easily lead to wound infection.
Advanced Care Advice:
For the perfect bouquet shape, after popping out 5 or more side shoots:
Use soft wire as a support frame
Rotate the pot direction regularly
Adjust humidity by adding paving stones quarterly
Use chlormequat chloride (0.02%) to control the growth of the bouquets.
Finally, remind everyone, no matter which method of sprouting, we should keep in mind the three golden rules of succulent care: rather dry than wet, step by step, according to the material. Each species has its own unique growth habit, such as the Sedum family of succulents is more suitable for the beheading method, while the twelve volumes of the genus is more recommended to naturally burst buds oh!
Why Succulent Pups Don’t Grow? 6 Solutions for Stunted Succulent Offshoot
“How can I keep them and stop growing when they’re clearly bursting with side shoots?” Don’t be anxious! Today we will find out the six major culprits that hinder the development of side shoots, and teach you to save the “dwarf pups”!
🔍 Culprit #1: Suffocating Mansion Crisis
⚠️ Symptom Diagnosis:
Crown size of mother plant > 2 times the diameter of the flowerpot
Side shoots are crowded into a “stacked”.
Drainage holes drilled by roots at the bottom of the pot
💡 Solution:
The time to change pots: choose the operation of the cloudy days of spring and fall
New pot size: 3-5cm larger than the current crown (red clay pots are the best)
Potting tips:
Cut off water for 3 days in advance to facilitate de-potting
Keep 1/3 of the original soil to protect the roots
Add bone meal as base fertilizer
🌵 Culprit #2: Suffocating Survival Space
⚠️ Typical mistake:
Accumulation of old leaves at the bottom forming a “leaf cage”.
Lateral bud density >5/cm2
💡 A must for master modelers:
Monthly cleaning of 3 layers of aged leaves at the base.
Use curved tweezers to remove leaves blocking side shoots.
Maintain a “center-radial” growth pattern.
☀️ culprit #3: vampires who see the light
📊 Light requirement chart:
Neonatal period: 2-3 hours, east-facing windowsill.
Growing period: 4-6 hours, supplemental light 8h
Mature stage: 6-8 hours, open air
💡 Hands-on Tip:
Use toothpicks to prop up the sheltering leaves
Rotate the pot 180 degrees every week
Golden Rule: Side shoots should cast a clear shadow to meet the standard
🩺 Culprit #4: Hidden Root Lesions
🔬 Self-examination trilogy:
Lift plant gently, loose roots = rotten root warning
Observe the potting soil, white crystals = salinization
Smell the roots, sour rotting odor = fungal infection
💊 First aid program:
Rotten root treatment:
① trim the roots to see white healthy tissue
② Soak in potassium permanganate for 20 minutes.
③ Dry the roots for 3 days and then pot them in moist soil.
Salinization treatment:
Soak the pot with rainwater for 3 times, 1 hour each time.
🌱 Culprit #5: Hungry Pellet Prisons
📌 Golden formula for soil preparation:
Budburst = 50% terracotta + 30% peat + 20% volcanic rock
⚠️ Newbie Misconception: Pure Pellet Soil = Stagnant Growth
💡 Upgrade Program:
Add 5% vermicompost as slow-release fertilizer.
Spread 0.5cm of fermented pine scale on the top layer to moisturize the soil.
Replenish monthly with seaweed extract (diluted 2000 times).
💊 Culprit #6: Pseudoscientific Fertilization Methods
🚫 Lightning Guide:
Imbalanced nitrogen, phosphorus, and potassium ratios (ideal ratio of 3:1:5)
Substandard coating technology (dissolves in water = burns roots)
Containing hormone ingredients (leading to deformed growth)
✅ Fertilizer selection tips:
Recognize Osmocote coating technology
Choose 3-4 months of slow-release period products
Choose by particle size:
2-3mm granules: spreading
4-5mm granule: soil mixing application
🌟 Advanced Care Package
👉 Weekly Record: Capturing the growth of side shoots with a macro lens
👉 Magic Tool Recommendation:
Root Viewing Mirror (monitor the root system without hurting the soil)
Intelligent light meter (cell phone to check the light data)
👉 Exclusive recipe:
Banana Peel Ferment (Potassium supplement): Water = 1:50 👉 Semi-Annual Watering